A decent kick requires a combination of flexibility, balance and strength. This combination of exercises works on all three to help you kick higher, harder and land safely and ready to throw the next technique.
1. Lateral Stretch
Probably the simplest, but also the most difficult. If you really want to improve your flexibility, you need to stretch every day and push yourself that little bit further each time. With the lateral stretch, simply stand with your feet as far apart as possible and hold your weight there - use your bodyweight to push your legs further apart, and your leg muscles to stop yourself from going further than you're comfortable with.
2. Lunge
A fantastic exercise for building strength - put one leg in front and the other behind with both feet facing forwards. Bend the front knee to at least a 90 degree angle and leg the leg behind drop down, keeping it straight. Go as far down as you can while supporting your weight with your legs. You can either do this as a static exercise, or do sets of lunges.
3. Squat
Stand with your legs shoulder-width apart and bend your knees at a 90 degree angle - ensure that your heels stay on the floor during the exercise. Like the lunge, you can either hold the position or do sets.
4. Leg Lifts
Stand on your hands and knees, keeping your back straight and flat. Raise one of your legs until it is at the same level as your body - don't let it dip lower than that at any point during the set - and lift and lower it for as many reps as you want per set. The key to this exercise is keeping your abs engaged, your back straight and making sure that your leg doesn't dip down too far.
5. Balancing
Like the lateral stretch, this is a fairly simple exercise that is quite difficult for a lot of beginners, Stand up straight, and lift your leg (keeping it straight) until it's at 90 degrees from your body (you need to be able to kick above waist height in kickboxing). As you're lifting your leg, let your body bend to the opposite side so it ends up in line with your leg - it will act as a counter-weight and keep you balanced. Unlike the squats and lunges, the point to this exercise isn't to strengthen your muscles, but to help you balance and teach you how to use your own body weight to help you lift your legs higher and stay balanced. It's a good idea to experiment with how high you can lift your leg and stay balanced. Make sure all your movements are slow and fluid, and your supporting foot is steady.
6. Multiple Kicks
Use a chair or table to balance for this one if you're not confident enough to kick without. These kicks don't need to be very fast, so take your time with them. Do a series of kicks without lowering your foot - to start with, try a waist-height front kick, roundhouse kick, chest-height front kick and then a side kick, and then lower your foot. Push yourself to kick higher each time, and ensure that you clearly show which part of your foot you are striking with.
7. Leg Swing
While holding on to a chair/table/door handle, keep your legs straight and swing one of your legs sideways away from your body as high as you can. Repeat this 20 times on each leg - you should go higher at the end than you do at the beginning.
Ultimate Kickboxing - North London

Kickboxing, fitness and nutrition in North London
Push Up Masterclass - 5 Push Ups You Should Add to Your Routine
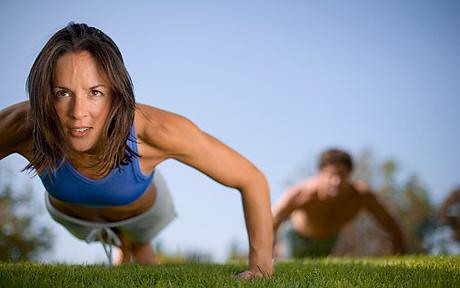
We've put together this Push Up Masterclass for those of you doing the Push Up Challenge, and everyone else that just wants to add some variety to their work outs and train different muscle groups. While the basic idea is the same (rest on your hands and feet and lift your own bodyweight), these exercises put more strain on different muscle groups.
The Classic
We all know this one - hands shoulder-width apart, legs and body straight with your feet together. There are quite a few variations on this if standard push ups are getting easy or if you want a change:
- Press your elbows against your sides
- Move your hands closer to the centre
- Only rest on one leg
Once you can do all of those, it may be time to try one-handed press ups. See the exercise below if you prefer to build up to it!
Monkey Push Up
Put your feet together and sit upright on your heels with your knees apart. Then, put your hands on the floor in front of you (with your arms in between your knees) and bend your elbows to press down and push all the way back up to the original sitting position. The push up itself will need some speed to get you back to the original positions.
Shoulder Push Up
This is something that a lot of beginners tend to do, which (ironically) is actually harder than the Classic push up. Start off in Classic position, but bend your body at the hips at a 90-100 degree angle (it may be easier to do this with your feet apart). Press down and push up, keeping the bend in your body and your legs straight. This push up is fantastic for your shoulders.
Lizard Push Up
This push up involves walking forwards, so ensure you have enough room to do so. Start in the Classic position, and move your right hand and your left leg forwards (bend the leg outwards to do so, but ensure that your foot is just going forwards), move forwards into your new position and press down with your right leg still outstretched and your left hand still lower down (so you haven't 'finished' the step yet), push up, then move the other hand and foot forwards and repeat. If you have trouble, just imagine a lizard walking.
One-Handed Push Up
One-Handed Push Ups are generally the preserve of the incredibly strong and balanced, but there is a good way to work up to them. Start in the Classic position, but put your knees on the floor and slightly apart - bend your knees at 90 degrees. Put one hand on your hip, and the other in the centre in front of you, press down and push up. Always ensure that you do equal amounts on both hands.
Always stretch and warm up properly before exercising, even if you are only doing a few push ups!
If you want to build your strength and stability, and incorporate new exercises into your workouts, visit one of our classes. More information can be found on http://www.ultimatekickboxing.co.uk/ .
Push ups

If you're serious about increasing strength and endurance, push ups are a fantastic way to help. A lot of students have trouble performing press ups when they start, but with consistent training, they're fairly easy to learn.
If you train for 3 days a week, for 6 weeks, most people will be able to work up to doing 50-100 consecutive press ups. The most important part is to maintain good form - sagging bodies and half-press ups will not help you build strength - and to exercise often.
This work out is based on a person being able to perform 10-20 good, consecutive press ups.
Week 1:
For days 1 and 2, do a 10 min warm up (try our tabata warm up to do it in 4 if you're short of time) and then complete 5 sets of push ups.
Set 1 - 10
Set 2 - 12
Set 3 - 7
Set 4 - 7
Set 5 - as many as you can do (at least 12)
On day 3, add 2 push ups to each set.
Week 2:
With week 1 behind you, you've alread started building strength and increasing your endurance. Throughout the 6 weeks, ensure that you're maintaining good form, but don't hesitate if you need to take slightly longer breaks in between sets.
For days 1 and 2, warm up again and complete the following sets:
Set 1: 14
Set 2: 16
Set 3: 12
Set 4: 12
Set 5: as many as you can (at least 17)
On day 3, add 3 to each set again.
Week 3:
Half way! By this point you should be feeling a difference. Don't slip up though, and make sure that you are doing 5 sets 3 times a week.
On days 1 and 2, warm up again:
Set 1: 20
Set 2: 25
Set 3: 15
Set 4: 15
Set 5: as many as you can (at least 25)
On day 3, increase the set values:
Set 1; 22
Set 2: 30
Set 3: 20
Set 4: 20
Set 5: as many as you can (at least 28)
Week 4:
Week 4 is where you begin to really push yourself every single day - unlike the first 3 weeks, the set values increase every day.
Day 1:
Set 1: 21
Set 2: 25
Set 3: 21
Set 4: 21
Set 5: as many as you can (at least 32)
Day 2:
Set 1: 25
Set 2: 29
Set 3: 25
Set 4: 25
Set 5: as many as you can (at least 36)
Day 3:
Set 1: 29
Set 2: 33
Set 3: 29
Set 4: 29
Set 5: as many as you can (at least 40)
Week 5:
To continue pushing yourself, now we've increased the number of sets but decreased the set values slightly - you'll be able to do more press ups but over a slightly longer period, with more rest.
On day 1 and 2, complete the following sets:
Set 1: 19
Set 2: 29
Set 3: 22
Set 4: 22
Set 5: 18
Set 6: 18
Set 7: 22
Set 8: as many as you can (try for at least 50)
On day 3, increase all the set values by 2.
Week 6:
We've included a total structure change on week 6, which will take you up to 100 press ups with breaks in between the sets.
Increase the number of press ups by 1 in each set, until you're at 10, and then work back down. Your set values will be 1,2,3,4,5,6,7,8,9,10,9,8,7,6,5,4,3,2,1. However, by this point and due to the new values, you should be taking much shorter breaks. Try doing the same number of sit ups instead of resting.
Congratulations - if you just did that, you just completed 100 press ups. Why not test yourself on day 4 of week 6 to see if you're up to 100?
And if you need inspiration, have a look at this guy.
Healthy lemony chicken recipe (25 minutes)

A quick and easy recipe, that's full of protein and perfect for a post-workout meal.
Chicken breast fillets (1-2 per person)
Rice
Chicken stock
4 Lemons
1 can sweetcorn
1/2 white onion
1/2 red pepper
3 eggs
Olive oil
Begin by setting your oven to 200 degrees C and wrap your put your chicken on a baking tray. Cut one of your lemons in half and squeeze out some of the juice onto the chicken, drizzle on some olive oil and wrap in foil. Put into your oven for about 20 minutes.
While the rice is cooking, half your lemons and squeeze all of the juice out into a bowl. It helps if you get a fork and push it into the flesh to get more of the juice out. Put the stock into a saucepan on a medium heat and add the lemon juice - leave to simmer until it reduces down to a jus.
Finely chop the onion and the pepper. Add both to a frying pan with some olive oil and the sweetcorn. Cook until softened, then add your rice. Stir in your eggs, one by one, until the rice is coated.
Take the chicken out of the oven and check that it is cooked through. Chop into chunks and add to the frying pan with the egg-fried rice mixture. Mix together and pour the jus over the chicken and rice, and serve!
Thanks to Moyan Brenn for the image.
Subscribe to:
Posts (Atom)