10 Things to do with a Medicine Ball


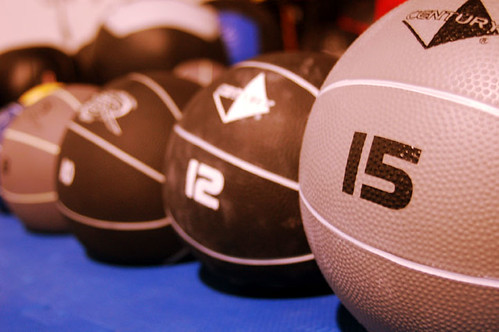
We've recently added medicine balls to our equipment at the dojo; they are fantastic for building core strength and stability, and building strength. As we've started running open sessions for adults who would like to train independently, we thought we'd give you some ideas of how you can add this equipment into your workout.

Chops
This is essentially using the medicine ball the same way that you'd use a kettlebell. Stand with your feet slightly further than shoulder width apart, and hold the ball with both hands, with your arms straight and the ball at chest height. Lower the ball and bend your knees at the same time so that you end up in squat position with the ball slightly further back than your feet. Then bring the ball back to chest height while straightening your legs. Repeat.

Diagonal Chops
The same as chops, but instead of moving from the chest to between your legs, you move the ball from just above your right shoulder to just outside your left knee (and vice versa). This is great for your obliques.

Figure Eights
Begin with your feet shoulder-width apart and the ball at ear-height on your right. Bring the ball in an arch over your head and to your left, then down diagonally towards your right knee, and arch down to your left knee and up to your right ear again. Ensure that it's a smooth motion, and that the ball goes on the outside of your knees.

Circles
Like the figure eights, but instead of crossing over, you move in a circle.

Single Leg Chops
Like the chops detailed above, but standing on one leg. Make sure to alternate legs to get a balanced workout.

Squats
Stand with your feet slightly further than shoulder-width apart and the ball at chest height, with your arms straight. Squat down - make sure that you keep your back straight, face forwards and keep your shins upright (as if you're sitting down on a chair). Once you've reached a 90 degree angle, start moving back up. Don't lock your knees out when you straighten your legs.

Squat Throw
Same as squat, but instead of keeping the ball at the chest-height, throw the ball up above your head when you bend your legs and catch it at the bottom. Keep your arms above your head when catching, and don't throw it too high up!   Return to chest height as you straighten your legs.

Lunges
Stand with your feet shoulder-width apart with the ball at chest height (with your arms straight). Step one foot forwards and bend that leg until your knee is at 90 degrees, with your back foot facing forwards and knee moving towards the floor (don't actually rest it on the floor). As you're bending your knee, raise the ball above your head until your arms are straight up above your head. Reverse the movement to go back to start position, and repeat on the other leg.

Medicine Ball Push Up
Get into push up position with both hands resting on the medicine ball. Keep both hands on the medicine ball and bend your arms to lower yourself towards the ground as far as you can go. Hold there for a breath and exhale as you straighten your arms again. Ensure that it's a smooth, controlled movement. If this is your first time, you may want to keep your feet slightly further apart than usual for stability.

Two-Arm Wall Pass
Stand in front of the wall, about an arm's length away. Keep your feet shoulder-width apart and begin by holding the ball behind your head with both hands. Raise the ball over your head and forwards until it is against the wall, and move back behind your head. As always, ensure it's a smooth and controlled movement, and that your heels stay on the floor throughout the movement.


Thanks to Sean Walsh for the image.

10 Minute Workout

As with every quick workout, ensure that you stretch and warm up properly to avoid injuries. 

Bounding (1 minute)
Used by Usain Bolt, this exercise is fantastic for building leg strength. It's essentially a slowed-down version of running; begin by squatting. Jump forward as far as you can and only land on one leg, and ensure that leg stays bent. Once you're balanced on that foot, bound forwards and land on the opposite leg and keep it bent. Run forwards like this for one minute.

Single-leg Side Pank (2 minutes)
Lie on your side with your hips and feet stacked. Raise yourself onto one hand, and ensure that your arm and body are perfectly straight. Raise your upper arm up straight towards the ceiling and then raise your upper leg (keeping it straight) so that your foot touches the hand in the air. Make sure that you don't twist your torso. Move your leg back down and repeat.


Perform the exercise for 1 minute on each side.


Walking Lunges (2 minutes)
Step forward with your right foot into a lunge position (with your right knee behind your right foot, back straight, toes pointing straight ahead). Then step forwards with your left foot so that you're in the lunge position with your left leg in front. The aim of this exercise is to walk without letting your legs straighten out (therefore performing lunges). When you take a step forwards, make sure that you're bending both knees and that your knee is pointing towards your big toe. Don't let your knees extend beyond your feet.

Rotating Push Ups (30)
Get into the standard push up position and bend your arms until your chest and nose are as close to the floor as you can get them, while keeping your body straight, and then push up (completing a standard push up). While you're up in push up position, extend one hand out to your side and then twist so that it is pointing up at the ceiling, while still at a 90 degree angle from your body. Once you've done that, resume press up position and repeat on the other side. Repeat 30 times in 3 sets of 10. 


Tuck Jumps (30)
Stand with feet shoulder-width apart and hands by your sides. Jump up, tucking your knees up as close to your chest as possible. Repeat 30 times in 3 sets of 10.

Bounding (1 minute)
Repeat this exercise to finish your workout. 
 

5 Ways to Get Out of a Frontal Strangle Hold

This can seem fairly difficult to get out of - largely because people start to panic when somebody has their hands clasped around their neck and start doing incredibly ineffective things like trying to pull their hand off by grabbing onto the attacker's forearm. There are a lot of fairly simply ways to get out of a frontal strangehold that don't require a massive amount of training or strength.

1) Arm over
Lift a straight arm up and over your attacker's arm (so that their arm ends up in your arm pit). To do that, you'll have to turn a little, and force their arm downwards in the process. Continue forcing their arm down until they have to let go - you'll have your bodyweight behind this manoeuvre so it doesn't require you to be stronger than your attacker. Your natural position at the end of this technique will lend itself to a backfist or knifehand strike.

2) Strike to temple
Just because you're not in a dominant position doesn't mean you should stop attacking - in fact, that's one of the worst things you could do. Make a fist, but instead of curling the thumb over your index and middle finger, bend it so that the knuckle of the thumb sticks out of the side of your fist, and the end of the thumb touches the first knuckle of your index finger. Use that thumb knuckle to strike your attacker in the temple - hard. It's generally best to do this with a straight arm (and you'll probably have to to reach).


3) Strike to inside of elbow
Joints are always a good weakpoint to aim for in a self-defense situaton - whether you want to bend them the wrong way to break, or minimise your attacker's reach advantage in a frontal strangle. It's is particularly effective if you can't reach to do a temple strike or eye gouge. If their arm is outstretched, simple use a ridgehand to strike to the elbow, forcing it to bend. A natural follow-on from this technique is to twist to the side slightly and then use a knife-hand strike to the throat.


4) Drop and strike to knees
Another technique that goes for joints. Hold onto your attacker's wrists with both hands, and drop down. Use a low front kick to strike at your attacker's knee - go for the inside of the knee, right on the joint, and hit hard.


5) Eye gouge
Attacking eyes is one of those techniques that will work on pretty much anybody - protecting the eyes is a natural reaction, and an attack evokes the same sort of panic as a choke. Use a spear-hand to strike at the eyes - it doesn't need to be particularly hard to be effective, but it helps. 


There are a myriad of other techniques you can use - jamming your keys into your attacker's wrist if they're handy, pinching them hard in the armpit or striking to the armpit, kicking to the groin etc. Which is these techniques works best will really depend on your situation - if your attacker has a longer reach than you, then 2 and 5 are not options. If there are a number of attackers, you may not want to use 4 as you will end up on the floor.

3 Common Kickboxing Mistakes


It takes a long time and a lot of practice to learn to control every part of your body, and use it in a way that is condusive to hard, accurate strikes. While beginners come in with varying physical fitness and experience in martial arts, there are a number of common errors that most beginners make due to inexperience. These are usually quite easy to correct and don't worry - eventually they will come naturally to you!

Striking with the wrong part of the body
This seems to be particularly prevalent with roundhouse kicks - a lot of beginners (especially juniors) tend to kick with the inside of the foot rather than the top, which makes it awkward, risks knee and hip injury and means you can't hit as hard. One of the worst things you can do during a kick is striking with your toes instead of the proper part of your foot - they break very easily.

When you're practicing these techniques, just run through them slowly a few times to get your body used to the correct movements and how you need to lean back to balance, or turn your hip slightly to get your foot into the right position. Your Sensei will always tell you which part of the foot or hand to strike with.

Lowering your guard
Your guard is there to protect you - use it! A lot of beginners (and sometimes more advanced grades) forget to guard their chin - particularly when you have to move the other hand to guard it during strikes from the back arm. One of the easiest ways to knock somebody out is a decent hit to the chin - in a competition, the fight's over. In a streetfight, you don't know what will or won't happen once you're unconscious - just make sure nobody manages to knock you out.

A lot of beginners also forget to protect their ribs during kicks - just because you are striking, it doesn't mean you can't be hit. Protect yourself at all times.

Not using the whole body
You don't just punch with your arm - it would be practically impossible to get a decent amount of force into a punch if you did. You move your body weight, you turn your hips, you push your shoulders into it. A punch actually involves your entire body. Kicks and knee-strikes are the same - you need to push your hips through to extend fully. It can take a while to get used to it.

Breathing: How To

 It's something that's reiterated in the dojo over and over again, and something that's essential to your existence. It seems strange that something so basic can be done wrong. In martial arts, correct breathing is the difference between being winded and not being able to continue fighting, and just having a punch bounce off. In self-defense, not breathing correctly can result in serious injury.

Breathing is something that beginners need to actively control when they are practicing - correct breathing will come naturally to advanced grades who have practised properly during training sessions.


How to breathe
You should breathe in through your nose and out through your mouth. Ensure that you are not simply breathing with your 'upper lungs' - you need to breathe as deeply as you can to get as much air as possible into your lungs. Ensure that your stomach is moving in and out when you are breathing, and that your ribs move up with you inhale and back down then you exhale. Pay attention to these movements and ensure you are doing this with every breath.

When to breathe
In order to maintain rhythm and ensure that your entire body is united when expressing a technique, you need to exhale when striking. Vocalisations help with this, as you need to exhale sharply to make a noise when striking.

You should apply this concept to all aspects of your training; exhale when performing the harder part of each exercise (i.e. the upwards motion on a push up or squat). This will get your body used to inhaling and exhaling at the right times, and will ensure healthy blood pressure, heart rate and oxygen transfer when exercising or fighting.

Effects of not breathing correctly
Taking a punch to the stomach can wind you if you are not breathing correctly. However, you can seriously injure yourself even if you have not been hit. If people have weak cardiovascular or respiratory systems, and frequently hold their breathe while contracting their abs and diaphragm or exhale sharply while constricting the glottis, they can induce black outs or even strokes. In order to perform techiques safely and effectively, it's essential that you learn to control your breathing.


Thanks to Chi Liu for the image. 

Get More Out of Your Workouts: Perfect Your Technique

A lot of people miss out on getting the full value from their exercises because of their form - a few simple changes to how your do your exercises can increase muscle growth and strength. 

Squats
A mistake that a lot of people make is trying to bend their legs to crouch down. Instead, try to imagine sitting down on a chair - keep your shins as vertical as possible, and counter the imbalance by leaning your upper body forwards, but keep your body straight and your abs engaged throughout the exercise. When you come up. pop your hips forwards to complete the exercise. Look straight ahead throughout the exercise.

Lunges
A lot of people transfer the idea of squats and leaning forward to lunges, which is a mistake. Keep your front heel down, and do not lean your body forwards over your knee. You should not be able to see your front foot. Keep your body straight and vertical, and your abs engaged. Try not to rest your hands on your thigh, and look ahead throughout the exercise. The motion of the back leg should be a controlled bend, not just sagging down.

Push Ups
Instead of simply concentrating in moving up and down, you can improve this exercise by adding a little push to the end to increase the shoulder and back workout. After you've bent your arms, and when you've straightened them back out, try to push your upper back towards the ceiling a little more. Ensure that it is a slow and controlled push. So the movment is not simply up-down, it is up-push further up-down.

For more ways to make your exercise more effective, check out 5 virtually instant ways to improve you workout.


Thank you to Yelkaim for the image.

Photos from ECKA Full Contact Fight Night

There were some fantastic fights at Fight Night on 7th May - spectators were treated to a mixture of ECKA kickboxing, MMA, K1 and boxing, as well as a capoiera demonstration during the interval. A massive congratulations to our sister school in Enfield, who now has their first female full contact champion!


One simple trick to staying on your diet


It's week 4 of the diet, and both I and Jim are probably going to extend it further as it's going so well. I'm in the process of writing an ebook with plenty of recipes and tips on how to follow the diet. If there's one tip I had to give for staying on diets, it would be this: buy your food online.

Meal planning
To ensure that I didn't get sick to death of the food, and that I wasn't constantly nipping to the supermarket, I've had to plan meals for the entire week - shopping online really helps get everything together quickly and easily, and I can look up recipes depending on what was on offer there that week, which also helps with budgeting. Meal planning is a pretty integral part of sticking to any diet - if you fail to do this, you may well end up having to rely on takeaways or grabbing a bite to eat from the local cornershop (which isn't going to stock fresh sandwiches and fruit).

Resisting temptation
This is the biggest reason I tried not to venture into supermarkets this month; it's all to easy to accidentally wander into the biscuit section, or the bakery, or see the offers on the end of the aisles and just 'accidentally' buying it. It sounds odd. but I manage to get a lot of confectionary without meaning to if I'm not concentrating (damn that sweet tooth!). Without the temptation of BOGOF offers, the smell of freshly-baked croissants and the lure of the chocolate section, keeping healthy is a lot easier.


Budgeting
Cutting out additives, simple carbs and adding in more lean meat, fish and fresh fruit/veg/nuts is surprisingly expensive. Online shopping just helps to keep an eye on the price for the weekly shop without having to put too much effort into it.


Thanks to Phenuncle for the image

Stretching

Stretching is an incredibly important part of exercise, and something that you should do regularly throughout your life as it helps minimise muscle tightening and restricted range of movement as you age. Stretching not only increases your flexibility and reduces the risk of injury - it also reduces muscle tension, helps circulation and increases energy levels.

Always warm up and stretch before undertaking any exercise, but it's also a good idea to stretch regularly even if you are not exercising. You naturally get the urge to stretch in mornings or when you're tired - why not simply do a range of stretches that work your entire body, instead of just your spine?

How to stretch safely
  • Do not bounce in your stretch
  • Make sure that increasing your stretch is a gradual movement
  • Take breaks between stretches; do one stretch, then move to another, and go back to the original one again. You should be able to stretch further than the first time you did the exercise.
  • Exhale when pushing further into the stretch
  • A stretching/burning pain in your muscles is ok, but if you start getting a sharp pain or any pain around your joints, stop immediately
  • Don't force your body to go too far - stretching involves pushing your body a little bit each day. Do not get frustrated and end up injuring yourself. 
Different stretches 

This diagram shows a range of stretches for your whole body.


 1) Chest: Clasp your hands behind your back and hold them to pull your chest apart. Raise your hands up (still clasped) as far as you can.
2) Upper back: Clasp your hands on front of you and keep your arms straight, raise your hands up to chest height and pull your shoulder blades apart.
3) Triceps: bend one arm and put it down the middle of your back. Either push near the elbow (not on) with the other arm, or bring it up the back and try to join your hands.
4) Calves: Stand in the lunge position - instead of bending the back leg, keep it straight with the heel on the floor.
5) Hamstring: Either lie on your back with your legs bend, and raise and straighten one leg, pulling it towards your chest with your arms (keeping it straight), or stay standing and put one straight leg on a chair (heel on the chair) and push down a little).
6) Quads: Stand up and bend one leg - using your hands, pull it up and towards your body. Keep your knees together.If you have balance problems, you can do this lying down.
7) Outer thigh: Lie on your back, with both legs bent and in the air. Cross your legs over, using the upper leg to push the lower leg to the opposite side.
8) Inner thigh: Stand with your legs just over shoulder-width apart. Bring your bodyweight over one foot by bending the leg, which stretches the opposite thigh.
9) Inner thighs: Lie on your back, bend your legs and bring your feet together, letting your legs fall apart. You may want to push a little near your knees (not on)
10) Lower back: Either lie on your back with your legs bent and let your lets fall to one side, and keep your shoulders flat on the floor and point your hands in the opposite direction to your legs, or lie on your back, bend your legs and clasp your hands behind your legs (you can do this with both legs together, or one by one).
11) Torso and quads: Sit up straight with your legs out straight in front of you. Bend one leg and bring it over the other. Look over the other shoulder, and use the opposite arm to the leg push it further across.

Make sure that you stretch both sides equally, and do not push on joints.

Do you have any other stretches that you do regularly?